What is SLA 3D Printing?
Introduction to SLA 3D Printing
In this section, we examine the fundamental features and characteristics of SLA 3D printing technology for prototyping and final product manufacturing. By studying this part of the 3D printing school, you can gain knowledge about the mechanics of SLA technology, its advantages, and its limitations.
What is SLA?
SLA technology, or Stereolithography, is an additive manufacturing process from the photopolymerization VAT family. In SLA technology, a part is selectively solidified layer by layer using a UV laser source. The materials used in SLA 3D printers are light-sensitive and solidify when exposed to UV light.
SLA technology was the first 3D printing technology in the world: The patent for SLA 3D printing technology dates back to 1986. SLA has always been the optimal solution for rapid prototyping of parts that require high precision or a smooth, high-quality surface.
SLA 3D printing has many similarities with DLP technology. These technologies can be categorized together. Some consider DLP 3D printers a subset of SLA 3D printers.
The difference between DLP and SLA 3D printers lies in how the resin is solidified; SLA 3D printers use laser light to solidify the resin, whereas DLP 3D printers use a projector to project the desired sections onto the resin and solidify it layer by layer until the object is fully formed.
Currently, DLP 3D printers are used more for gold and jewelry molding, while SLA 3D printers have many applications in engineering products and industrial prototyping.
How Does an SLA 3D Printer Work?
An SLA 3D printer creates parts in the following way:
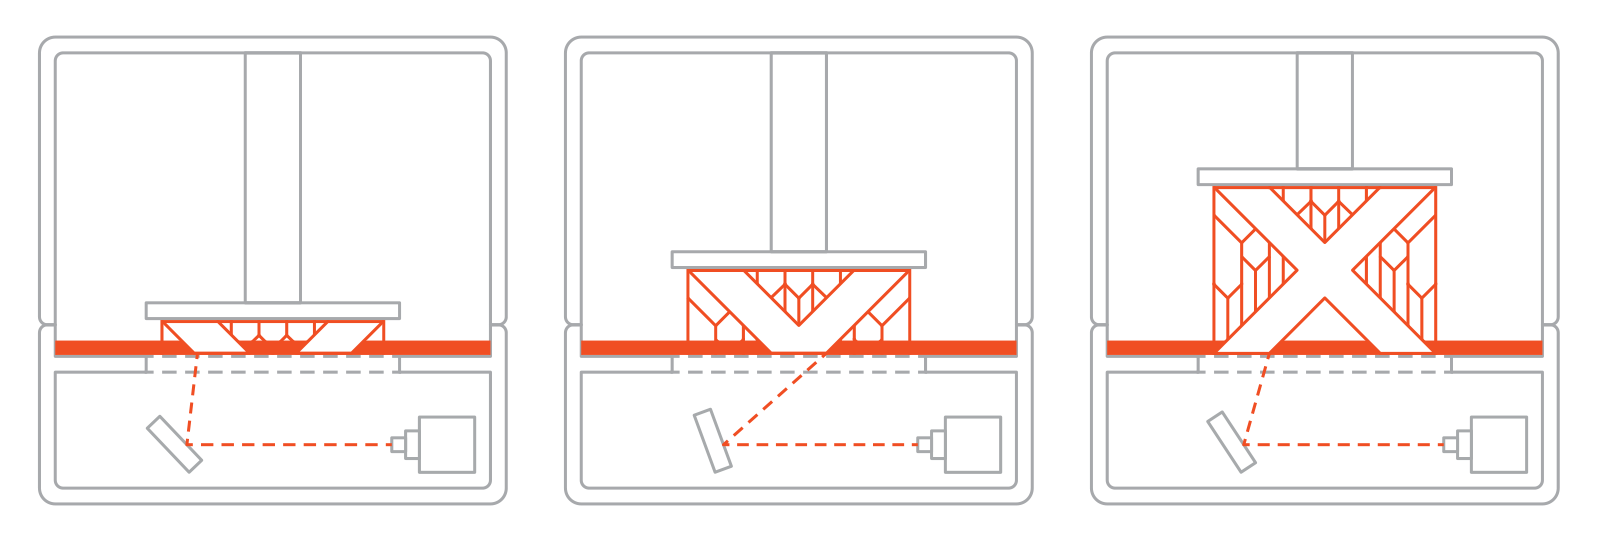
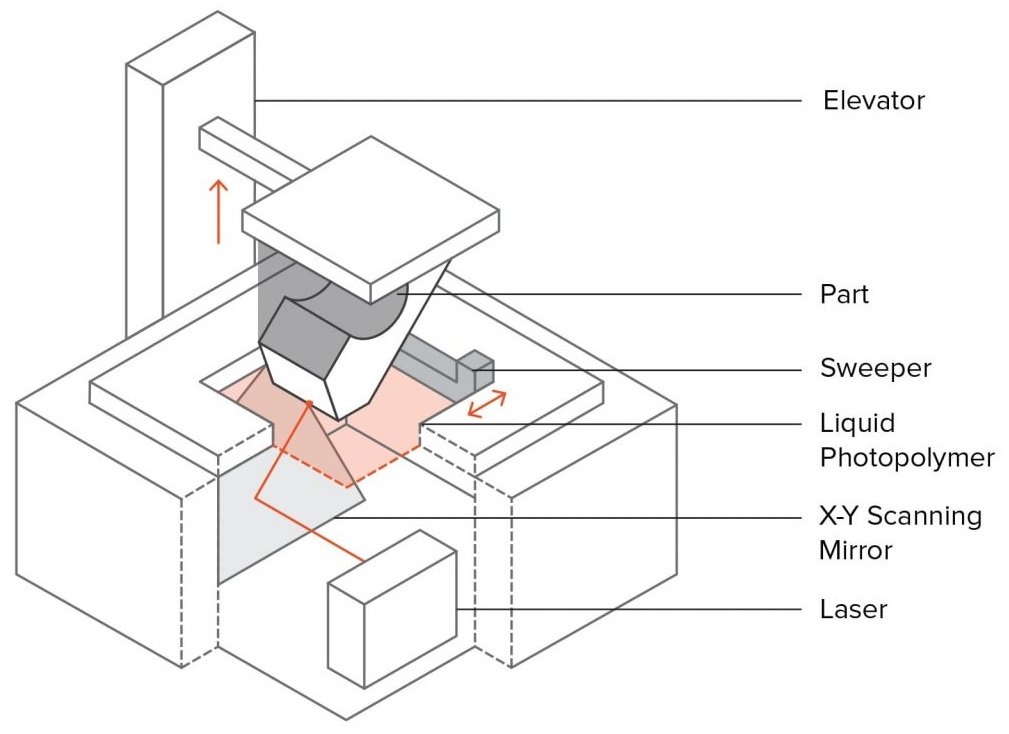
- Initial Setup: Initially, the build tray is positioned within the resin tank, just one layer’s distance from the surface of the liquid.
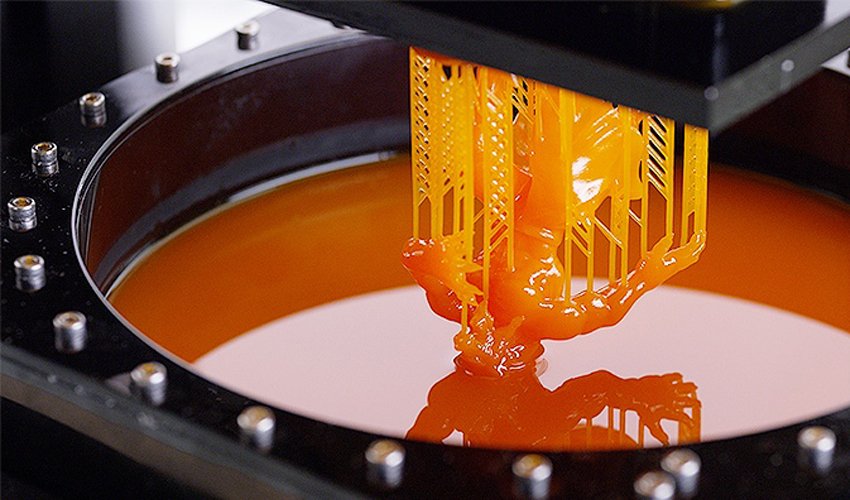
- Layer Formation: Next, a UV laser is directed to the cross-section of the object on the liquid resin surface. This solidifies the photopolymer resin, forming the first layer of the part. The laser beam is guided along a predetermined path by several mirrors, accurately shaping the cross-section on the resin.
- Building Process: After each layer is created, the build platform moves up by the thickness of one layer, and the laser projection process is repeated. This cycle continues until the complete formation of the part.
- Post-Printing: After 3D printing, the part has a semi-solid, greenish appearance. It requires post-curing (exposure to UV light again) to achieve its best possible mechanical and thermal properties.
- Solidification Process: The liquid resin solidifies through a process called photopolymerization:
- In the solidification process, the carbon chains of the monomers that make up the liquid resin are activated by UV light and bond together, forming strong, inseparable links.
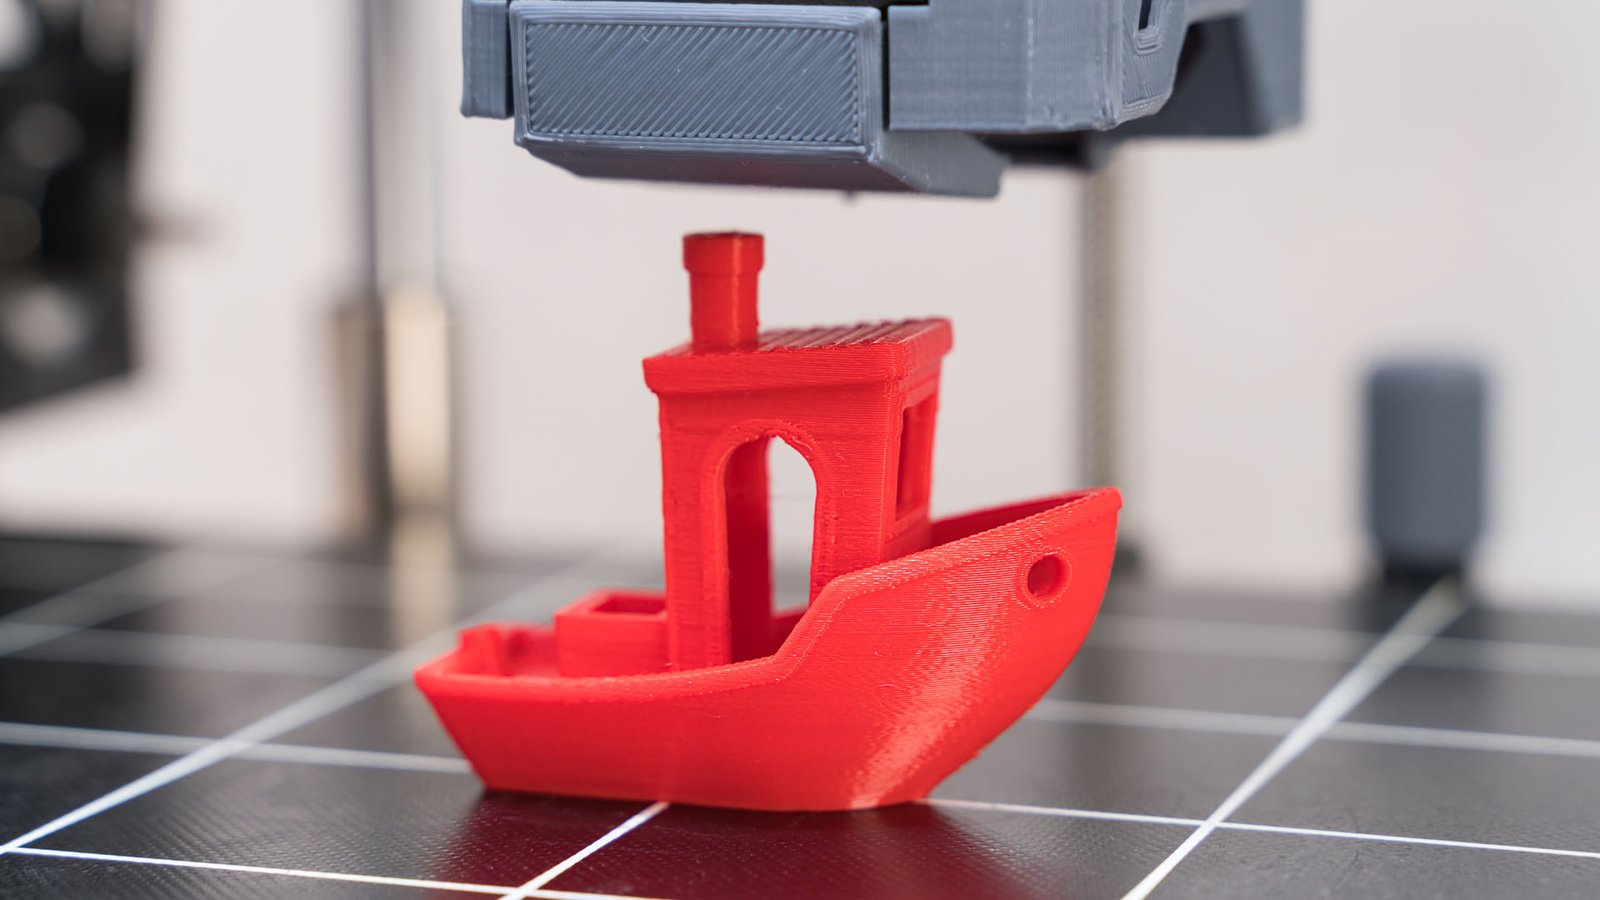
- This photopolymerization process is irreversible, meaning there’s no way to re-liquify the solid resin. If exposed to high temperatures, instead of melting, it will burn. This is because the materials used in SLA 3D printers are made of thermoset polymers, as opposed to the thermoplastics used in FDM 3D printers, which can be melted and solidified repeatedly.
Latest Articles in your inbox
Subscribe to our newsletter to get the newest manufacturing and industrial services articles in your inbox once a week.